Wednesday, 19 March 2014

Gardens

Looking back at my original plans for the scene, I always wanted to include a walled garden area. So today I have begun modelling some walls and a pond as the starting point. I imported one of Alex's bird bath models - however I have had to alter the mesh on this model as it was overly complex and there were a few out-of-place vertices/faces that needed fixing. 


Monday, 17 March 2014

Textures: Manor House

I felt that the main walls of the manor house were currently looking too low-resolution, so I decided I would create a new texture that could be applied to each wall section separately.  


I started the new texture by painting a base colour layer and then adding a photo texture layer from a photo I had taken at Thorpe Hall. I had taken a few pictures of various textures I found on my visits, which I will be using in some of my texture creation although the majority of them will be created with only digital paint brushes. I removed all saturation from the photo first, and also altered the levels so that it had a good balance of light and dark areas which would create the illusion of a rough texture. I set the photo layer mode to multiply and decreased the opacity so that it blends into the colour layer.    


On top of that, is the cement layer which I made by first creating solid colour white brick shapes and then inverting the selection and filling the space on a new layer with an off-white solid colour. With that, I could then take a selection of 'bricks' and create an adjustment layer nested to the Base Colour layer to darken/brighten that selection - resulting in a random selection of darker and lighter bricks. This gives a little more realistic variety to the wall of the house.  


Next is to give the wall some natural dirt and grime. First I create a 'shadow' layer using the gradient tool at the top and bottom of the wall where you would naturally find more dirt from the ground and from where rain water drips down from the roof. Then there is the Dirt layer, where I use different brushes to give the effect of spots of dirt and also streaks of grime. 


Next was the texture for the columns at the front of the house. I used the same techniques as before, except that I used no photo images in this texture. Every part was created using different paint brushes. 


After checking how the texture looked when applied to the house model in Maya, I thought it looked a little too dark so I decided to make some alterations to the hue, saturations and lightness in the Photoshop file and reload it. I'm more satisfied with the way it looks now. 

Tuesday, 11 March 2014

Entrance Gate UV mapped


Today I've finished mapping the entrance gates, and also creating a small chain to hold the padlock to the gate. 


Sunday, 9 March 2014

CanJam 2014

Over the 8th-9th of March I took part in CanJam 2014 - a 24 hour game jam held at the University of Lincoln. The jam is a competition for teams to create a video game designed with a chosen theme, all within 24 hours which is then judged by the events organisers and guests from games production studios such as Rockstar and Crytek.

I teamed up with Alex Saye and Sean Oxspring (who are both doing the programming for my third year project) to create "Abduction Addiction". The three of us brainstormed our ideas for the game at the start of the jam, my role for the rest of the time was creating all the models and textures.

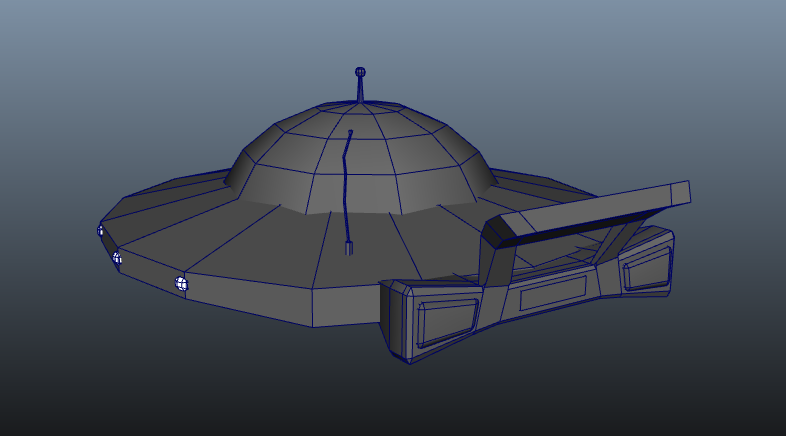
Below are all the models and textures which I created in the 24 hours of the jam. I was asked for them to be as low poly as possible (except for the UFO), which also made it easier to model, UV and texture them within the time limit.


Below is some footage of my team's finished game. I also created the terrain texture of grass and roads.


Taking part in the jam helped me gain some experience in team work and video game development. I had to try to create what my other team members wanted, to a standard worthy of competition and also within a set amount of time. 

Wednesday, 5 March 2014

UV Mapping the Manor House and Groundskeeper's Hut

Continuing with UV mapping, I've mapped all of the parts that form the back entrance of the manor house ready for texturing. 


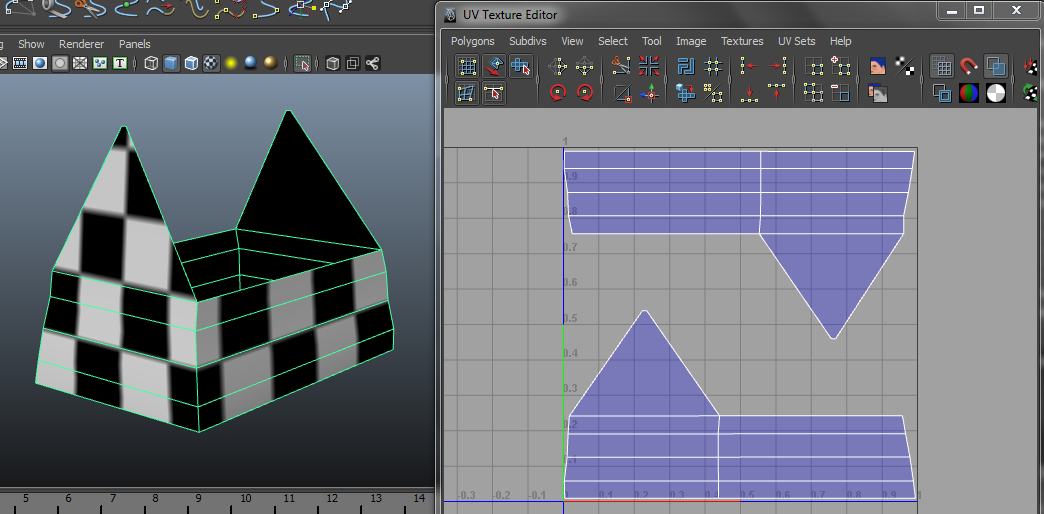
Once this was sorted, I moved onto mapping of the groundskeeper's hut. This includes the main building, roof, chimney, door and frame, windows and frames and the wooden planks boarding the windows. Below are just a couple of shots showing how I've unwrapped the main body of the hut and the roof.  


Friday, 21 February 2014

New Tree Type

I want to have a few varieties of foliage in my level, so I've started work on a second tree-type. I'm going to allow this one to be a little higher in poly count (under 2000 triangles) as there will be fewer of this type used in the level. This type will also be placed more 'closely' to where the player will be roaming, as opposed to the first tree type which I will use to create a woody area around the outskirts of the level. 


I've tried out a different shape for the leaf plane which I've noticed being used in some examples of low poly tree models I looked at online. It's more like a curved plane which recreates the appearance of how a real-life tree's leaves form in sections. 

I have had to duplicate each of these planes, with one sitting very closely underneath the other and the normals reversed because in Unity, only the face normals appear visible - the other side of the faces are invisible. After a quick test with my previous tree in Unity I noticed that at some angles the tree branches appeared bare, but with the doubled planes technique, the leaf textures are visible at all angles.  


In Photoshop I've painted two variants of a copper birch tree leaf. I decided to go for a red/purple hue like one I tested in my concept art from pre-production, I think it will be an interesting contrast to the turquoise and greens that dominate the rest of the level. 


This is the finished tertiary branch texture, each leaf was originally on a separate layer so that I could alter the hues and brightness of a selection of leaves in order to give the branch some variety. I created two variants of this texture too, so that the tree should look a little more natural.  


This shows how I've built up layers of leaf planes from the lower branches upwards. 


The almost fully-filled tree. 


After the poly count exceeded 2k triangles, I decided that I would need to change the mesh of the leaf plane in order to halve the number of triangles. Now the tree is just over 1500 triangles. 


The tree model (not yet with textures or a skybox) in Unity. Once the normal maps are sorted it will start to look a little more solid. 


Monday, 17 February 2014

Improving the Tree (Type 1)

I've started work on the textures for my first type of tree. The leaves are based on a Sycamore, but I have painted them from scratch in Photoshop. 


I layered the leaves over and under one another, and also tweaked the hue/saturation/lightness of a selection of leaves to give the branch some natural variation. 


This is how I built up the layers of leaves, from the lower branches upwards.